Advanced Usage
Refer to this page for more advanced usage of Motchiri Shader.
(For general issues, see “Troubleshooting” or “Q&A”.)
EX Collider Settings
Motchiri Shader has 4 default colliders (your left and right index fingers, and other people’s left and right index fingers). You can also set up EX colliders (capsule colliders).
Placing motchiri_shader/EX/Motchiri_Stick (Motchiri Stick).prefab under an avatar’s bone allows you to set up a new collider. With default settings, you can also touch other people’s Motchiri Shader. Avoid using more than 2 prefabs at once as they will interfere with each other.
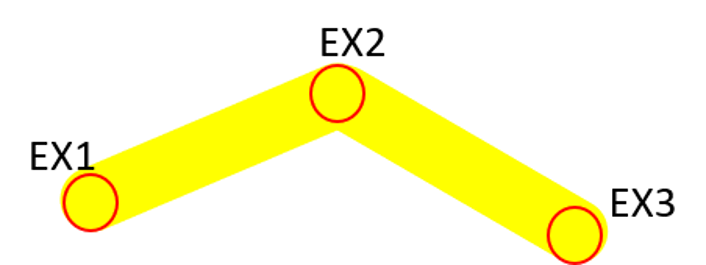
Inside the prefab, there are EX_Sender_1~3 colliders displayed as three small spheres. In practice, they form a capsule-shaped contact from EX1 to EX2 to EX3. (This is a special detection different from the default colliders.)
By moving EX_Sender_13, you can freely configure the collider. To create a spherical collider, place EX_Sender_13 in the same location.

Applying It to Other Meshes (Face, Tail, Clothing, etc.)
Use the setup tool to apply it just as you would to a body. However, if you do so without further steps, any part of that mesh will transform, and it can break where polygons suddenly change (though a uniform mesh like a tail is usually fine). Therefore, you must create a mask specifying which parts you want to be squishy. For advanced mask creation, black out the areas you don’t want to squish, such as non-cheek parts or the edges of clothing. Note that some avatars, like Maya, already have cheeks set up by default.
A system to inflate fabric
By inverting the Motchiri Shader and applying it to clothes, you could theoretically achieve something like this tweet.
Currently, it’s not easy to set up, but we plan to make it easier in the future.